There is no single pipe leak detection method that works on every leak. A professional survey picks from five or six, and the skill is choosing the right one for the pipe, the substrate and whether the water is hot or cold. This guide explains how each method works, what it is good at, where it fails, and the order a leak detection engineer usually runs them in.
Pipe Leak Detection Methods at a Glance
| Method | Best for | Will not find |
|---|---|---|
| Pressure testing | Proving a leak exists and isolating the circuit | The location. It tells you there is a leak, not where. |
| Thermal imaging | Hot water and heating pipes, underfloor circuits, leaks under screed | Cold leaks with no temperature difference, or anything too deep to reach the surface |
| Acoustic detection | Pressurised pipework, mains supply, buried services | Very low pressure, drainage, or anything in a noisy building |
| Tracer gas | The awkward ones: plastic pipe, low pressure, leaks the others missed | Nothing much, but the system has to be drained and charged first |
| Dye testing | Drainage, toilets, pools, flat roofs, wet rooms | Pressurised supply pipework, which is most domestic leaks |
| Moisture metering | Confirming that an anomaly is actually wet | The source. It maps the damage, not the leak. |
The short version: pressure testing proves there is a leak, thermal imaging or acoustic detection narrows it down, and a moisture meter or dye confirms it before anything is opened up. The methods are combined, not chosen between.
1. Pressure Testing
Pressure testing is where a proper survey starts, and it is the step homeowners most often skip. The system, or one isolated circuit of it, is brought up to pressure and monitored. If it holds, that circuit is sound and can be ruled out. If it drops, there is a leak on it.
Formally this is a hydrostatic test, and on a domestic system it is usually done with water rather than air. It does not locate anything. Its value is elimination: on a property with heating, hot and cold supply and drainage, knowing which of them is losing water removes most of the search area before any equipment comes out of the van. It is also the method that settles the common argument about whether a stain is an active leak or old damage that has already dried.
2. Thermal Imaging
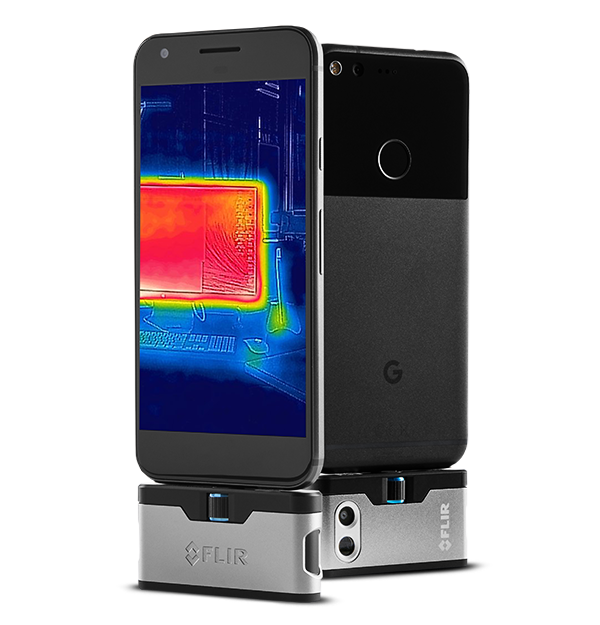
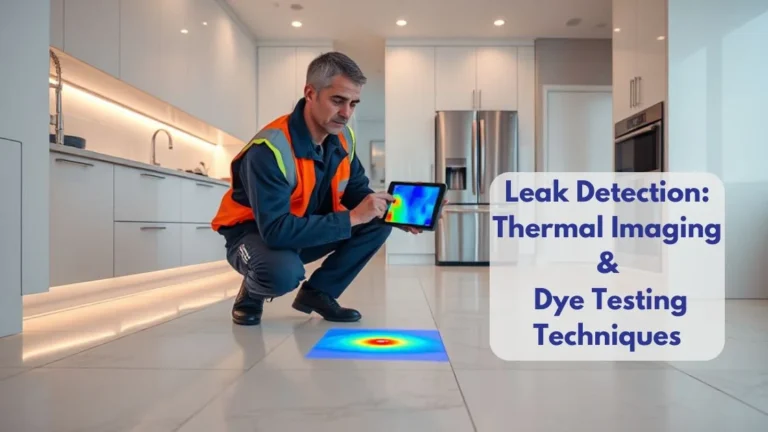
An infrared camera reads surface temperature and shows it as an image. A hot water or heating pipe leaking under a floor warms the surface above it; a cold leak cools the surface as the moisture evaporates. Either way the camera shows a temperature anomaly where the building should be uniform.
Its strength is speed over large areas without lifting anything. Its weakness is that it reads the surface only, so a leak that has not yet changed the surface temperature is invisible to it, and recent heating or direct sunlight can bury the signal in noise.
Full detail, including what a thermal camera can and cannot see and how to read a false positive, is in our guide to thermal imaging for leak detection.
3. Acoustic Leak Detection
Water escaping a pressurised pipe makes a noise. Ground microphones and acoustic sensors amplify that vibration and filter it from the background, and a correlator compares the signal at two points on the same run to calculate the distance to the source. This lets a technician walk a pipe run and mark the loudest point. On buried mains and supply pipework it is often the most precise method available. Where the pipe is buried under a driveway or garden, ground penetrating radar is sometimes used alongside it to map the run before listening to it.
It needs pressure to work, so it is poor on drainage and on a system that has already been drained down, and it needs a reasonably quiet property. More detail in our guide to acoustic testing for leak detection.
4. Tracer Gas
The system is drained and charged with a hydrogen and nitrogen mix. The gas escapes through the breach, rises through whatever is above it, and a surface probe picks it up. It is the most sensitive method in common use and it works where the others have failed: plastic pipe that carries sound poorly, very small breaches, low pressure systems, leaks under deep screed.
The trade-off is time. Draining and charging a system is a job in itself, which is why tracer gas is usually the second or third method tried rather than the first. See our guide to tracer gas leak detection.
5. Dye Testing
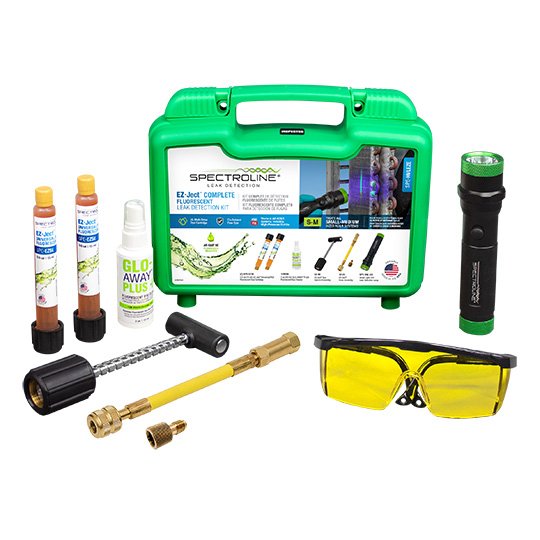
A non-toxic fluorescent dye is introduced into the water and the suspect area is checked, often under UV light, for where the colour appears. It is cheap, needs almost no equipment, and gives a completely unambiguous answer when it works.
The catch is that it only works where water is moving from a known point to an unknown one under gravity or standing pressure. That makes it genuinely useful for:
- Toilets. Dye in the cistern that appears in the pan without a flush confirms a failed flush valve, which is the most common invisible water waster in a house.
- Drainage and waste pipes. Dye poured down a specific outlet establishes which pipe is discharging where.
- Shower trays and wet rooms. Dyed water standing in the tray shows whether the failure is the waste, the seal or the tanking.
- Flat roofs and balconies. Flood testing a section with dyed water traces water ingress to its entry point.
- Swimming pools. Dye released near a suspected crack is drawn towards it, showing the flow.
What dye testing will not do is find a leak on pressurised supply pipework buried in a wall or floor, which is what most domestic leaks actually are. Water under pressure sprays into the structure rather than travelling to a visible point, so there is nowhere for the colour to show. If a leak detection company proposes dye testing as the primary method for a hidden pressurised leak, ask why.
6. Moisture Metering and Inspection Cameras
These are confirmation tools rather than detection methods. A moisture meter, pin type or capacitance, establishes that a suspect area genuinely holds water and maps how far the damage has spread. A borescope or inspection camera goes into a small drilled hole, a duct or a drain and simply looks.
Neither will find a leak on its own, but no responsible survey opens up a floor without one of them confirming what the camera or the microphone suggested. Our guide to the full equipment used to find water leaks covers the kit in more depth.
7. Continuous Monitoring: Leak Detection Sensors and Shut-Off Valves
Everything above is used to find a leak that has already happened. A separate class of device exists to catch the next one. A leak detection sensor fitted at the incoming main watches flow patterns and closes an automatic valve when it sees water running continuously, or at a rate the property should not be using at three in the morning.
These systems will not tell you where a leak is, and a poorly configured one generates a false alarm every time somebody fills a paddling pool. What they do well is limit how long a burst runs unattended, which is the single biggest factor in how much damage an escape of water causes. Some insurers now recognise them, so it is worth asking yours before fitting one.
How the Methods Are Sequenced on a Real Survey
- Establish there is a leak. Meter reading, pressure test, visible evidence. A surprising number of suspected leaks turn out to be condensation or a previous leak already repaired.
- Isolate the circuit. Heating, hot supply, cold supply or drainage. This alone usually removes most of the property from the search.
- Narrow the area. Thermal imaging on a heating or hot water circuit, acoustic on pressurised cold supply, dye on drainage or a wet room.
- Confirm before opening up. Moisture meter readings, a second method agreeing with the first, or a borescope through a small hole rather than a large one.
- Document it. Images and readings, which is what turns the survey into evidence rather than an opinion.
What Decides Which Method Is Used
- Hot or cold. Hot water and heating leaks favour thermal imaging. Cold supply favours acoustic.
- Pressurised or not. Supply pipework can be pressure tested and listened to. Drainage cannot, which is where dye earns its place.
- Pipe material. Copper carries sound well and suits acoustic work. Plastic damps it, which often pushes the job towards tracer gas.
- What is on top of it. A leak under 150mm of concrete behaves very differently to one behind a plasterboard wall.
- Access. Sometimes the fastest honest answer is lifting one board in the right place rather than surveying around the problem.
Choosing Between Methods on a Real Job
No single method suits every leak. Thermal imaging struggles where there is no temperature differential; dye testing suits drainage and pool work rather than pressurised pipework. Matching the method to the property is what keeps the survey short: a Downpatrick leak was located without opening the structure.
Whichever method is used, the cost of the investigation is often claimable where the leak has caused damage. PCLA does not offer no find, no fee: quotes are free and all costs are clear before work starts.
Frequently Asked Questions
What is the most accurate pipe leak detection method?
There is no single most accurate method, because accuracy depends on the leak. Tracer gas is the most sensitive in general use and is what engineers fall back on when the others fail, but on a hot water pipe under a floor thermal imaging will usually find the same leak faster. Accuracy comes from combining two methods that agree, not from any one piece of equipment.
How do you find a leak in a pipe without breaking the wall?
By narrowing the location before opening anything. Pressure testing establishes which circuit is leaking, then thermal imaging, acoustic detection or tracer gas locates it to a small area, and a moisture meter or borescope confirms it. The wall may still need opening for the repair, but a survey should reduce that to one small section rather than exploratory demolition.
How does a dye test work for finding leaks?
A non-toxic fluorescent dye is added to the water and the suspect area is inspected, often under UV light, for where the colour emerges. It works where water travels from a known point to an unknown one, so it suits toilets, drainage, wet rooms, flat roofs and pools. It does not work on pressurised supply pipework hidden in a wall or floor.
Is leak detection dye safe?
The dyes used for plumbing and drainage work are non-toxic and designed for the purpose. They are not intended for drinking water systems, and a professional will not introduce dye into a potable supply. Always use a product sold for leak detection rather than food colouring or anything improvised.
Can I find a pipe leak myself?
Some checks are worth doing: read the water meter with everything off, look for damp patches and unexplained warm spots on the floor, and dye test a toilet cistern. Beyond that the equipment is expensive and the interpretation is the hard part. The risk of a DIY attempt is not that you fail to find the leak, it is that you open up the wrong floor.
Who pays for pipe leak detection?
Where the leak has caused damage, the trace and access section of a home insurance policy often covers the cost of finding it, subject to the policy limit. That is separate from the escape of water claim for the damage itself. It is worth checking the cover before commissioning a survey rather than afterwards.
Detection in Northern Ireland: PCLA, 028 9581 5318, or NI Leak Detection. Detection in Scotland: Leak Detection Stirling. Claims: Northern Ireland 028 9581 5318, Scotland 0141 461 2406.